Feeds:
Posts
Comments

Posts Tagged ‘books’

I’m a book junkie.  I’ve always loved reading and have a week spot for the smell of a brand new book.  I’m inordinately proud of my bookshelves.  Um, there’s even a pile of sewing books I leave out for decoration.

The thing is sewing books really are all that.  The inspiration is endless.  The directions are there.  And, when you borrow them from the library, it’s all free!  There’s little need for buying patterns, when books like these abound!

Learning to Sew

Bend the Rules Sewing by Amy Karol.  This is the book that got me started actually sewing.  Very clear directions with Amy’s frank and casual vibe.  From sewing a seam to sewing a buttonhole.  Easy projects for the beginner.  Happy pictures.  Slight vintage flare.  See what people have made at the Flickr group.

The Modern Quilt Workshop by Weeks Ringle and Bill Kerr.  My favorite overall learn-to-quilt book that was available at the library.  Discussions of technique were very straightforward with lots of “this is why we suggest you do it this way.”  I learned a lot!

Quilt Making Basics by Elizabeth Hartmon of Oh, Fransson!  So this is a link to a series of blog posts, not a book.  Elizabeth is an amazing quilter and a great teacher.  She’s coming out with her own how-to book, The Practical Guide to Patchwork, sometime in the near future.  Can’t wait.

Applique

Sew Liberated by Meg McElwee.  All the ins and outs of how to applique.  Meg covers many different methods with precision and helpful tips.  Projects are adorable, yet modern and range from beginner to complex.  Popular projects:  soft baby book, art smock, children’s animal bag, camera bag, apron.  I made curtains.   See what people have made at the Flickr group.

Alabama Stitch Book & Alabama Studio Style by Natalie Chanin.  It’s all by hand, but don’t let that stop you – you’ll love it!  Natalie’s unique, earthy style lends itself to gorgeously embellished clothing, tablecloths, bags and book covers.  I refashioned this skirt.   See what people have made at the Flickr group.

Patchwork

I Love Patchwork by Rashida Coleman-Hale.  Rashida has an amazing sense of style and color.  This book is total eye-candy!  Lots of linen with modern prints.  Projects range from simple to complex.  Nice, clear directions.  Popular projects (um, all of them!):  calendar, travel sewing book, coasters, sewing machine cover.  See what people have made at the Flickr group.

Patchwork Style by Suzuko Koseki.  Drool.  This book is not for beginners, as it features minimal directions and projects with lots of small piecing.  However,the projects are amazing!  Modern, Japanese style.  Popular projects:  patchwork rug, pot holders, log cabin blocks/quilts.  I made the patchwork rug. See what people have made at the Flickr group.

Quilting

Last Minute Patchwork & Quilted Gifts by Joelle Hoverson.  Simply gorgeous.  My favorite collection of quilts with clear directions easy enough for the beginner.  Popular projects – quilted coasters, rainbow pencil roll, Color wheel quilt, Peanut the wee elephant, pin cushion.   See what people have made at the Flickr group.

The Gentle Art of Quiltmaking by Jane Brocket.  Jane shares her quilting process from inspiration to completion in detail, from color selection to borders to binding, on many beautiful quilts.  Her English cottage style is not my own, but I feel I learned a lot about color and scale.  See this review by The Sometimes Crafter.

Misc. Favorites

Handmade Home by Amanda Blake Soule.  A warm, eco-friendly book with a wide variety of practical and memory-keeping projects.  Not all sewing.  Directions are light, but the projects are easy enough for someone still new to sewing.  Definitely favors an earthy, homemaking type like myself.  My review here.  I made the word banner.  See what people have made at the Flickr group.

Seams to Me by Anna Maria Horner.  Lovely projects in Anna’s glowing fabrics.  A good intro-to-sewing section.  Popular projects – caddy pin cushion, hexagon patchwork baby ball, purses and aprons.  See what people have made at the Flickr group.

Sewing Bits & Pieces by Sandi Henderson.  Small projects made with fabric scraps.  Many show how to embellish something to make it more special.  Lots of projects to make for kids!  Great directions.  See what I made here.  See what people have made at the Flickr group.

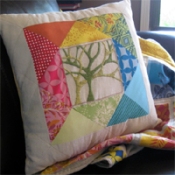
The New Crewel by Katherine Shaughnessy.  I have yet to find an embroidery book to love.  Crewel is much like embroidery, but more “chunky”.  This modern interpretation is packed with amazing designs.  Very easy to learn and the perfect way to get inspired for handwork.  I made this pillow and this one too.

Read Full Post »

Oh, I so wish you could have been here last night!  A group of 8 super fun ladies met at my house for a crafty social of sorts.  Cookies + Crafts + Friends = a Perfect Night! 

Sewing Bits & Pieces

So, what did we do?  Fabric gift tags – an easy, instant-gratification project from Sandi Henderson’s Sewing Bits and Pieces.

Fabric Gift Tags

Following Sandi’s instructions, we layered cardstock, then plastic wrap, then fabric and used a dry iron set on high to melt them together.  Once fused, simply cut into desired tag shapes, add decorative stitches and finish with a scrapbooking brad (also called an eyelet).  To use, write any message on the cardstock side of the tag.  The eyelet is for tying the tag to your gift.

Although we used 2 different types of plastic wrap, we couldn’t seem to make a permanent fuse.  So, it turns out that the decorative stitching was more necessary than optional.  That’s ok, it got some of our no-sew ladies a bit more friendly with the sewing machine!  Hand stitching with embroidery floss was a very nice option too.  If I were to do this project again, I’d buy a product designed to fuse, rather than using the plastic wrap.

some of my gift tags

Here are a few of mine.  I was going mostly for Christmas tags, since that seems to be a theme with me lately.  This fabric is one I received in a Holiday Scrap Pack from Sew Love Fabrics.  With all the fun graphics, it was perfect for tag-making, don’t you think?

a little Anna Maria Horner love

Check out these tags made by my friend Hannah!  She blew us away with her creativity and productivity.  I think she made like 20 tags!  And more than half of them were from my scraps of Anna Maria Horner’s Good Folks collection.  Kindred spirits, Hannah and I.  Anyhoo, as the night wound down she broke out the colored thread and used every one of my machine’s fun stitches to finish her tags with lots of personality.  I wish you could see them all.

Aaaah, good times!  Now I’ve got to keep my eye out for another easy project for crafty social take 2 sometime this fall.

Read Full Post »

Small Stash Sewing - Giveaway

So, the kind folks at Wiley Publishing sent me a copy of Small Stash Sewing that I didn’t need.  I guess it’s time for my first giveaway!  Here are some of my favorite projects from Small Stash Sewing: 24 Projects Using Designer Fat Quarters by Melissa Averinos.

A funky belt.

from Small Stash Sewing

A scrappy bath mat.

An adorable dress.

Something for my boy.

Please enter to win by commenting on this post.  I’d love it if you’d let me know of a recent post that you enjoyed at Stitched in Color… because I sometimes wonder what you like and what is more just for me!  But any comment will enter you to win.  For a second entry you can subscribe to my blog by email or through your reader.   Just make a second comment for your “I’m a subscriber!” entry.   Good luck!

I’ll close comments and choose a winner on Friday, July 9th.

******

And the random winner is comment #4 – Collie, who said, “I enjoy reading your blog. Your joy always comes through in your posts. I love the posts on things you are making for your home, especially the smaller projects that seem more attainable for me. You inspire me to get back at my sewing. Thanks”

Read Full Post »

at the Seashore

We spent Father’s Day weekend at the beach, camping with friends at Hunting Island, SC.  On the one hand, it was ridiculously HOT.  On the other hand, it was a wonderful, unforgettable trip.  You wouldn’t believe all the sea animals:  hermit crabs, live sand dollars, manta rays, blue craps, dolphins, sea turtles… even baby sharks caught at the pier.  Sand, sea and sun never fail to delight!

While on the road, I embroidered these snowflakes for my first Christmas project.  It was true serendipity that this sparkly silver thread was given to me by an old friend who found it in her attic just days before.

Embroidered Snowflakes

I also spent time pouring over Natalie Chanin’s two books:  Alabama Stitch Book and Alabama Studio Style.  And, since one of my favorite skirts was stained on the trip, I’m going to have to put her clever applique techniques to work in order to rescue it.  But not yet.

Right now I’m starting a new project for Amy of Progressive Pioneer.  I’m creating a tutorial for her virtual baby shower.  More details coming!

Read Full Post »

This morning Aria got comfy on the couch with our new pillow and my Colorbrick quilt.  It was a very warm morning…  I didn’t make them to match, per se, but Good Folks make good company.

Living Color Pillow w/Colorbrick Quilt
I put the final stitches on my Living Color pillow last night, while watching “The Invention of Lying” (which was a bust IMO).  The “twisted trees” design is from The New Crewel.  Because getting to the fabric store is just too much trouble for this busy mom, I recycled an old pillow, ripping out its stuffing to fill this new one, and backed my design with some yellow decorator’s weight fabric I had lying around.  Not sure if it was correct to do so, but I used one of those curved, semi-circular needles to hand stitch the bottom side closed.  A straight needle was causing a little ridge of fabric to form, but the circular needle made for a smooth finish.  So, I guess that’s right?

I was very tempted to try an invisible zipper closure via Sew Katie Did‘s tutorial, but in the end I decided to hand stitch it closed.  And, you know, for what it’s worth, I enjoy hand stitching so much that I’d probably just rip it open, remove stuffing, wash and restitch if necessary!  How’s that for stubborn?

By the way, gots to give credit to my mama who suggested a mirrored quilting design on the natural Essex linen/cotton frame.  I do love quilting patterns on solids it seems.

Read Full Post »

This weekend I spent a total of 7 hours in the car on a business trip to Atlanta.  My mom and business partner drove, so my hands were free as we chatted about this, that, the other and everything in between.  It was the perfect opportunity to try my hand at crewel embroidery.  Yes, crewel.  Odd name, I know.

I recently came across  The New Crewel by Katherine Shaughnessy when searching for modern embroidery books/projects on Amazon.  The designs inside are as delicious as the whimsical “Birthday Candle” motif on the cover.  Most are nature-inspired, and all have a chunky look that’s signature to crewel.  Apparently, crewel has been around for ages, but has lost popularity since its last heyday in the 70’s.  Traditionally it is done with wool crewel thread, which is more like yarn than like embroidery floss, and on linen twill.  Katherine’s book stays true to tradition but her designs are decidedly modern.

I love stitching.  When watching TV with my husband or riding along on a trip, I’d rather embroider than knit or crochet.  I settled on this twisted tree design from “The New Crewel.”  It reminds me of the gorgeous oak trees that arch over roads in low country South Carolina.  After tracing the design on a piece of natural linen/cotton Essex fabric, I packed my mother’s old crewel thread (there it was, mixed in with the embroidery floss she had passed down to me – what a happy surprise!) and set off.

WIP Twisted Trees

Here’s how far I got with at least 6 hours of stitching!  Wow, this is NOT quick work!  Or, I’m incredibly slow…  But, I love the process, so no problem!  I have another, lighter shade of green for the other tree in this design.  When it’s done, I think it’d look nice patched on a purse.  What do you think?  Any other ideas?

Read Full Post »

At home

At last, my Colorbrick Quilt is finished. Don’t I look fine curled up with it on the couch? Granted now it’s practically too warm for a throw quilt, but you don’t think I’m going to let that stop me, do you? Nope.

Quilting
You had seen the quilt top Work In Progress before, so I’ll tell you a bit about the finishing details. The back is mostly solid natural linen with a few strips of my favorite Good Folks fabric to liven things up. For batting, I used a thrifted army wool blanket. It’s washable, warm and indestructible. As such, I was able to quilt it loosely, just stitching in the linen “mortar” of the brick-inspired design.

Pieced Binding

The binding gave me the most trouble. I wanted to use a store-bought binding, so I settled with a bright yellow from Hancocks. It was brighter than I wanted, but I went ahead and focused on learning how to machine-apply binding. After I sewed the last stitch, I threw the quilt on the floor to get a look and immediately hated the binding. I removed it the next night! Forced to make my own binding, I used some trimmings from the quilt back and it wasn’t as hard as I feared.

Colorbrick QuiltI’ve used up my stash of linen, so I plan to order more for upcomming projects. I want to give credit to Rashida Coleman-Hane who blogs at I Heart Linen and recently published I Heart Patchwork. She’s created a fellow linen-lover. I too love how natural linen pairs effortlessly with fun cotton prints. It gives the look an earthy vibe, and tones down my color-loving craziness. I just droooool over I Heart Patchwork. It’s a beautiful book with lots of worthy projects. I made a set of Rashida’s Patchwork Coasters awhile back. My friends’ admiration drove us to organize a little sewing group where they are making Patchwork Coasters of their own. So, double thanks, Rashida, for helping spread the sewing-love among my friends! Coasters from I Heart Patchwork

Read Full Post »

Come, take a peak at a project I’m working on, inspired by “Sew Liberated: 20 Stylish Products for the Modern Sewist” by Meg McElwee! Meg’s book is a gorgeous introduction to the art of applique – sewing fabric patches or shapes onto a background fabric. Her directions are clear, detailed and accompanied by great pictures. She even gives specific recommendations for sourcing unusual supplies.

I am a newbie to both applique and embroidery. Meg’s excellent how-to primer at the back of the book, enabled me to use both skills with ease and utmost enjoyment on my latest project: Panel Curtains for Aria’s room. Take a look at Meg’s design for “Woodland Curtains” straight out of Sew Liberated:

I love everything about these panel curtains – the use of 2 background fabrics, the ribbon used as a dividing line and as curtain tabs and the applique design. My daughter’s old curtains were made of a bold stripe fabric from Ikea. I decided to use the stripe as the upper fabric and some solid pink I had on hand for the lower third. Since I didn’t have enough pink fabric, I chose to add a natural linen rectangle in the center of the lower third portion of the curtain. That natural linen serves as a perfect background for applique. With a few quarter yards of dot and stripe Lecien prints for the applique pieces, I had my fabric pool:

Now I LOVE Meg’s squirrel, but I felt it would add just one more design element into my daughter’s not-so-pulled-together room. One night as I sat in Aria’s room, mulling this over, I realized I could take pictures of some designs already in her room and then print them out to use as applique patterns! I’m sure this is not a new idea, but I have to say it makes it so easy! I took the bird from Jellybean Tree, which hangs above her dresser, and a flower motif from her lamp. Before printing, I used photoshop to create several sizes of the flower motif.

Next came the best part – using fusible web (thanks to Sew Liberated) to cut out the applique pieces from my fabric stack. Fusible web sticks to the wrong side of your fabric, to stabilize and make cutting small shapes a breeze. Then you simply place the pieces onto your background fabric and iron to fuse them in place. You can add decorative stitching… or not. I chose to make the bird applique without fusible web, using the raw edge applique method. Fusible web does add a stiffness to your work, which might interfere with the drape of the curtains if used on the large bird shape. Thanks for that tip, Miranda!

So fun! Lastly, I used some newly learned embroidery stitches also from Sew Liberated to add simple lines to my picture. And, let me tell you, embroidery is a great way to pass the time in the car or while watching TV. So mindless and so very satisfying. I used a chain stitch for the ground line and a stem stitch for the stems. Do you think I should add leaves? I like the simple/modern look of the design now, but wonder about adding leaves…

Now I just need to finish up my second linen panel for the opposite curtain and then do the final piecing together with the solid pink and bold stripe portions. I found some natural linen ribbon for the dividing line and curtain tabs. I’ll have to update this post when it’s all put together!

If you’re interested in seeing more from Sew Liberated, check out Meg’s website and blog, where you can see a detailed preview of the book, including the forest scene framed clock that I’m also working on! My thanks to Meg’s publisher for my own copy.

UPDATE: Here are some finished pictures of Aria’s Wildflower Curtains. I did leave the embroidery work pretty simplified, without leaves, trying to retain a modern vibe (though I couldn’t resist adding a pink decorative stitch to the linen ribbon). Now I’m dreaming of a quilt for Aria, to finish off her room….

Read Full Post »

This summer I learned to sew! I indulged my new passion with Amanda Soule’s “Handmade Home” (see my review). Because I so enjoyed Amanda’s book, I was intrigued by a new series of crafting books released this year by her publisher. The series, called Make Good: Crafts + Life, produces charming Japanese craft books in English for the first time. I fell in love with ALL of the titles… but first on my list to own was Patchwork Style: 35 Simple Projects for a Cozy & Colorful Life.

“Patchwork Style” is a very modern take on patchwork sewing. Chapters are organized by technique: Log Cabin, Applique, Patchwork Squares, Free Stitching and Square Applique. Some projects I know I’ll complete include designs for potholders (I’ve realized mine are downright embarrassing), a purse (SOOO many to choose from), a log cabin style chair pad (a la SouleMama) and some punchy couch pillows.

But, first on my list was new kitchen rugs. My old faithfuls from Target were disintegrating before my eyes. The very last pattern in “Patchwork Style” is modestly titled “Floor Mat”. I first stumbled across a finished version on SouleMama (again), which was how I discovered I’d have to get the book. I indulged in some fabrics by Anna Maria Horner and sat down at the sewing machine AS IF I knew a thing about sewing.

getting started

This “Floor Mat” is actually a work of applique that’s machine quilted and then backed. To get started, I chose a relatively monochromatic background (I love color, so that’s about as monochromatic as I could go) and started clipping fabrics in random shapes, artistically (I hope) layering them on the background.

IMG_0247

Once everything looked just right, I sewed on the collage, layered up my rug “sandwich” and started quilting. It took FOREVER. Apparently, sewing a straight line every 3/8 inch is a LOT of sewing. I couldn’t believe how much thread it took!

IMG_0238

My goal was to complete the first rug in time for a visit from some relatives, so I had a deadline that kept me going. IMG_0243I did get the larger rug done in time, and thank goodness, my visitors noticed the rug very soon upon entering our kitchen. If it wasn’t for that deadline… well, I’d be where I am now – working very slowly on this, my second, smaller rug to be placed in front of our fridge. No matter how long it takes, I still find myself craving that sewing time. I am astounded by what can be done, the possibilities and the results. A big THANK-YOU to all the crafting mamas who encourage me through blogs and through real-life friendships to “Make Good: Crafts + Life” in my own home!

Read Full Post »

On Saturday I found a very special package awaiting me at the mailbox – my pre-ordered copy of Amanda Blake Soule’s “Handmade Home: Simple Ways to Repurpose Old Materials into New Family Treasures” plus “Bend-the-Rules Sewing” by Amy Karol. Both are gorgeous, inspiring books written by popular bloggers. I’ve just began to sew, having only accomplished: 1 flat valence curtain, 1 crayon roll, and 1 blanket repair! Of all of the sewing how-to and household project books I checked out from the library, “Bend-the Rules Sewing” was my favorite. It has a concise, illustrated guide to basic and somewhat advanced sewing a techniques (from sewing a seam to sewing a buttonhole), plus a large selection of adorable, unique projects that are very up-to-date. I liked the book and projects so much, I decided it was worth owning. And, what better way to treat myself than to purchase “Bend-the-Rules” along with the soon-to-be-released “Handmade Home”.

For weeks I’ve been waiting, and now that Amanda’s “Handmade Home” finally here, I cannot be more pleased. I bought the book on faith, seeing as how there are no Amazon reviews. My faith was based on my love of her first book “The Creative Family: How to Encourage Imagination and Nurture Family Connections.” That magical book is responsible for beginning my adventure into all things Waldorf! It is “family culture” at it’s finest and an excellent gift for any mother of little ones.

I wasn’t sure what I’d get in “Handmade Home”, but now I can tell you! The first part of the book is a primer on the eco-friendly art of reusing old materials. It’s filled with tips for getting the best finds at thrift stores, garage sales, etc. She shares what to look for, even with reminders to leave behind those great deals that one doesn’t need for the next thrifter – it’s “thrifting karma” says Amanda. Excellent advice! There’s also brief ideas for setting up a sewing space in a small area.

The second part is a large collection of 30+ projects organized by categories: Nourish (as in kitchen items), Nurture (as in wellness), Play, Seek (as in adventure) and Retreat (as in decor). The categories are loose, but they do give you a peak into the scope of the projects. And they are not “the usual” projects. No patchwork quilts or aprons here. Those are useful patterns (and can be found in “Bend-the-Rules Sewing”) that anyone might want, but not what you’ll find in Handmade Home. Amanda Soule’s book brings many ideas that incorporate childrens’ art – “Portrait Bookmarks” – or make use of fabric scraps – “One-Word Banner”. She includes several non-sewing projects, often using decoupage. There are useful, but “alternative” patterns for items like cloth diapers, rag bags and women’s cloth. And then, there are memory-preserving projects like the “Memory Tree Quilt Art.” Everything is beautiful! And, just as with her blog SouleMama, everything is presented along with inspiring photography. Along the way she shares “crafty tips” and “earthy tips” – both of which share ways to craft smart, making safe, eco-friendly choices.

I have only begun to absorb the goodness to be found in this little volume. But, just this weekend, I have finished an embellished bath mat and have begun a “One-Word Banner” for my son’s room, using my husband’s discarded wool sweater and fabric scraps from my son’s crib bedding and nursery items. I think that “Handmade Home” will enrich the life of many a “Green Mama” interested in creating and reusing. Enjoy!

Read Full Post »